|
Sample Information |
  
|
| Show/Hide Hidden Text |
|
Sample Information |
|
| Show/Hide Hidden Text |
T |
Information (eg. Coupon Status) (see Pre-Defined ) |
Not Applicable |
Not Applicable |
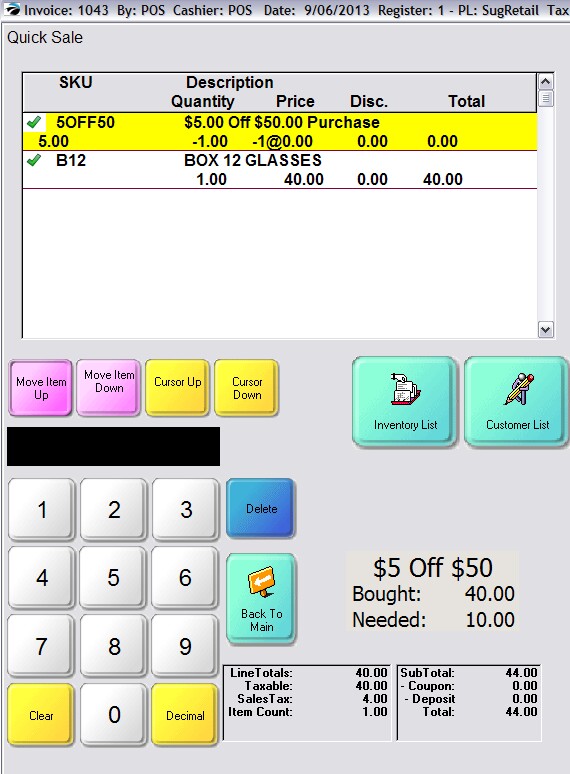
This button is used in conjunction with a Coupon created in Coupon Manager which stipulates a minimum purchase level before the coupon is validated. It alerts the cashier about how much more the customer must purchase in order to qualify for the discount. Here are some sample screen shots. 1) A coupon which will give the customer $5.00 off any purchase of over $50 is added to the invoice. 2) A $40.00 item added to the invoice does not trigger the $5.00 discount
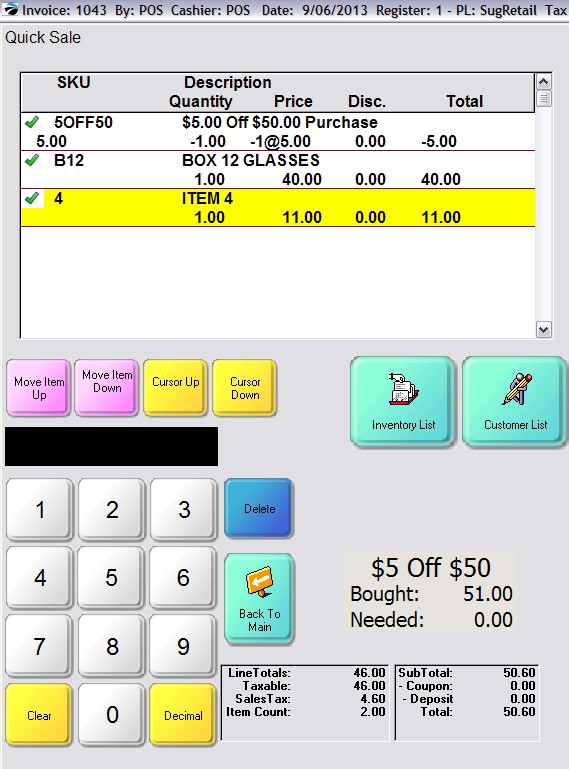
3) When another item for $11.00 is added to the invoice, the coupon discounts the invoice by $5.00.
See Special Instructions on this page for details about how to set up this feature. |
Special Instructions
This button is used in conjunction with a Coupon created in Coupon Manager which stipulates a minimum purchase level before the coupon is validated. You first need to
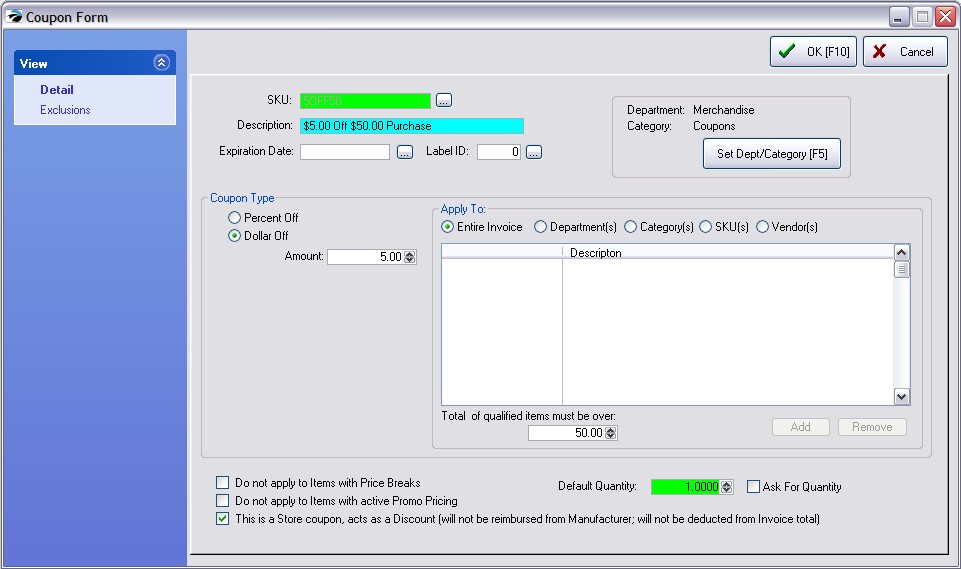
Here is a Sample Coupon Note that the options are "Dollar Off" = 5.00 and the "Total of qualified items must be over" = 50.00
|
B) Add the Information button to the Touchscreen
1) Using techniques explained previously, add the Information button (under Controls tab) to Page 0 of the touchscreen. Set the size of the button to Width = 115 and Height = 50 2) Choose the + button on the control panel (to the far right of the SKU field) to enter the formatting code listed below. The following CODED text is required for this button You may copy and paste this information into the box and make changes as needed. Make sure that the copied text is single spaced. ******* Copy the following text ********* <Canvas Background="#FFC8C1B8"> <Grid Height="220" Width="600" Canvas.Left="0" Canvas.Top="0"> <Grid.RowDefinitions> <RowDefinition Height="30"/> <RowDefinition Height="26"/> <RowDefinition Height="30"/> </Grid.RowDefinitions>
<Grid.ColumnDefinitions> <ColumnDefinition Width="85" /> <ColumnDefinition Width="90"/> </Grid.ColumnDefinitions> <Rectangle Grid.ColumnSpan="2" Grid.RowSpan="3" Fill="#FFE6E3DE"/>
<TextBlock Grid.ColumnSpan="2" HorizontalAlignment="Center" FontFamily="Tahoma" FontSize="26" Text="$5 Off $50" /> <TextBlock Text="Bought:" Margin="6,0,0,0" HorizontalAlignment="Left" FontFamily="Tahoma" FontSize="20" Grid.Column="0" Grid.Row="1" /> <TextBlock Text="[COUPONBOUGHT]" Margin="0,0,6,0" HorizontalAlignment="Right" FontFamily="Tahoma" FontSize="20" Grid.Column="1" Grid.Row="1" /> <TextBlock Text="Needed:" Margin="6,0,0,0" HorizontalAlignment="Left" FontFamily="Tahoma" FontSize="20" Grid.Column="0" Grid.Row="2" /> <TextBlock Text="[COUPONBALANCE]" Margin="0,0,6,0" HorizontalAlignment="Right" FontFamily="Tahoma" FontSize="20" Grid.Column="1" Grid.Row="2" /> </Grid> </Canvas>
*******The above information must be copied into the Touch Screen Information Panel.*******
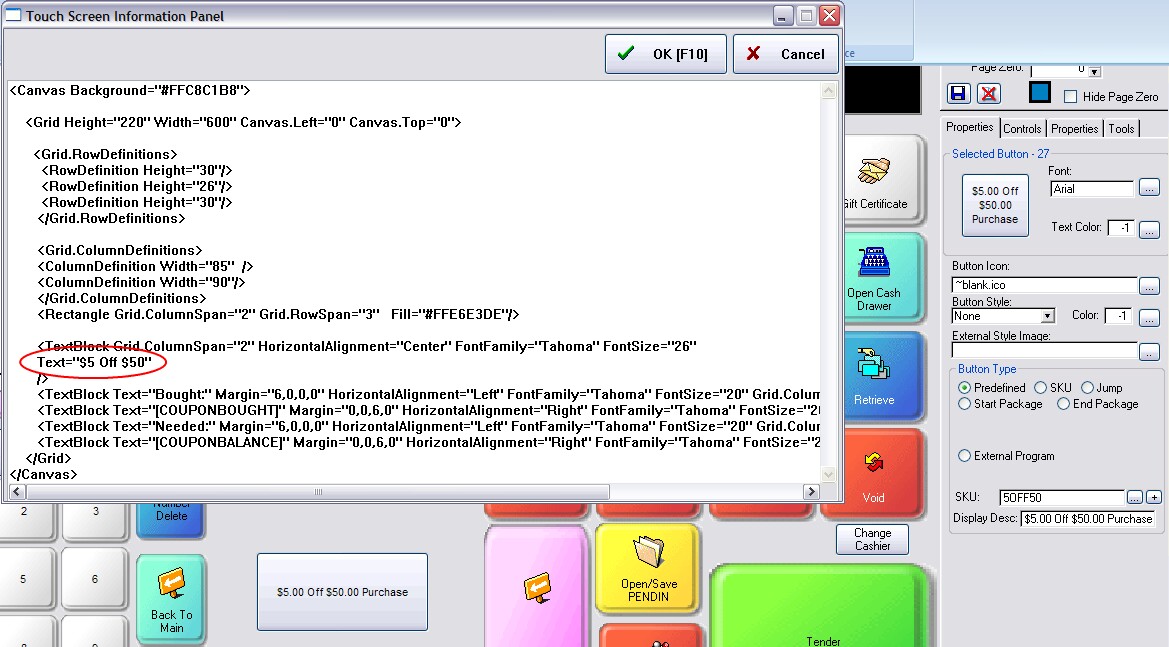
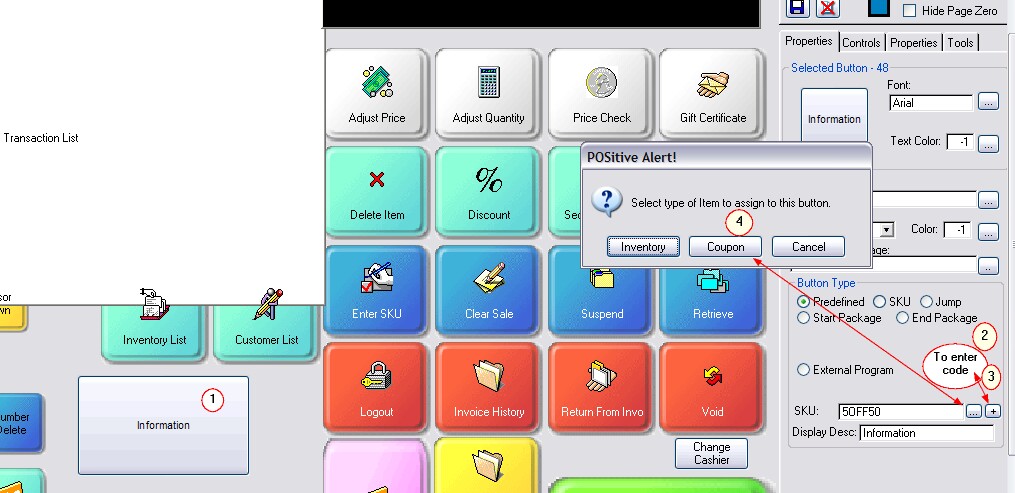
3) Paste the above code into the Touch Screen Information Panel and change the TITLE text. Note: the circled coded text in the picture below is the Title and it can be changed to match your coupon values.
4) Choose the Lookup button next to the SKU field to select the SKU. Choose Coupon as the type, and select your Coupon which you created in Step (A).
5) (You should click on the + button again to make sure your code is truly in the Touch Screen Information Panel.) Then Save your touchscreen design and run the touchscreen. |
C) Using the Information Button
1) Run the touchscreen. The Information display should be visible already. 2) Add your Coupon (as created in Step A) to the invoice. The coupon can be added to the invoice at any time, but the coupon must be on the invoice for the calculations to work. 3) Add inventory for the invoice and watch the Information display field. |