|
Set a Range of Dates |
  
|
|
Set a Range of Dates |
|
When prompted to enter a beginning and ending date, you are often provided with this speedy shortcut. By selecting an appropriate button the dates are filled in automatically.
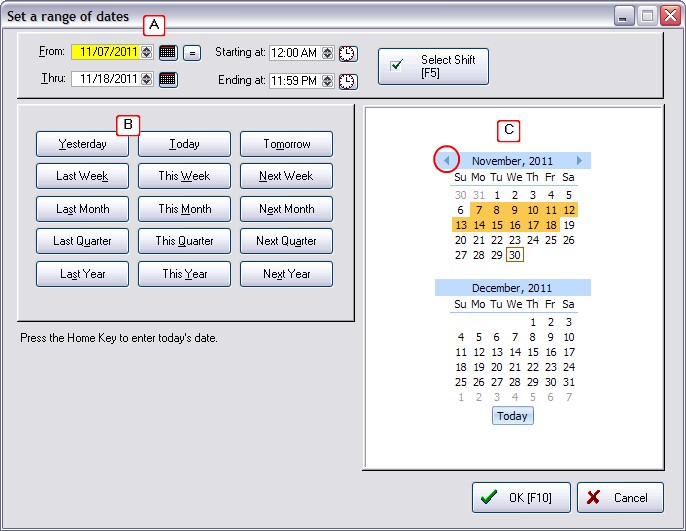
A) Manually enter the From and Thru dates
You can type in the field or use the small calendar icon to the right to select a date.
The = button will make the Thru date the same as the From date
The "Select Shift [F5]" button is only available when reporting on invoices. (see below)
B) Preset buttons
Choose one of the buttons for selecting a pre-set date range.
C) Select from Calendar
In the example above, the mouse was used to highlight the dates in November (in orange) and the From and Thru dates are automatically filled in.
The left and right arrow buttons in the November title line allows you to change to previous or future months.
Today's date is boxed in red. The Today button will reset the calendar.
FINISHED
When your selection is correct, press the Complete button. To cancel, click the X box to close the window.
TIME RANGES
Some reports are more valuable when filtered to specific time periods. On the right-hand side you can set a Starting and Ending Time for the report or choose a Shift Definition.
Select Shift [F5]
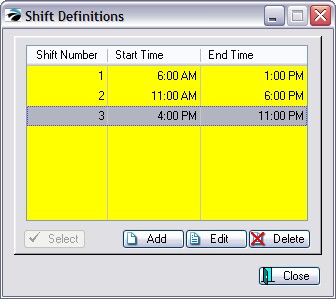
Instead of having to manually enter Start and End times, you can pre-define work shift periods and select a time period to report on. Defining a shift can be done from here or from Maintenance: Definitions: Employee Shifts.